Sunday, January 30, 2011

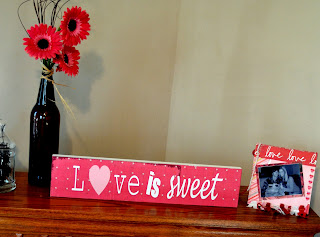
Valentine's Day "Love is Sweet" sign


As I was working on this project over the weekend, I ran across these old wooden boards I had bought months ago from Hobby Lobby. I have been patiently awaiting the perfect project to come about, so while I had all of my supplies already scattered about I decided to give it a go.

Supplies:
  • paint brush {$1}
  • patterned scrapbook paper {$0.64- Michael's}
  • matte mod podge {$4- Hobby Lobby}
  • wooden sign {$5.99- 50% off= $3}
  • vinyl {glossy white}
  • vinyl cutting machine
 Here's what you do:

First off, choose one sheet of 12x12 scrapbook paper of choice. 
Then flip over the paper and place the wooden board in the corner of your paper and trace the outline. Because the board is longer than 12 inches in width, you will have to trace it multiple times. So, move the top of the board down to the line you just traced and trace another line underneath the bottom. Your paper should be divided into three segments. 
{Sorry I don't have a picture}

Cut along the two lines you traced. You will end up with three pieces of paper. Only use the top two pieces. The third {bottom piece} will be slightly shorter than needed.

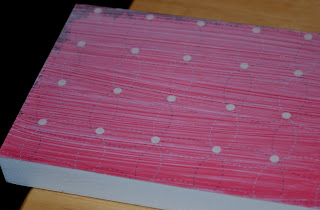
Next, mod podge the base board like so.


Then apply your scrapbook sheets over top of the board and adjust to fit accordingly.
{FYI- if using patterned paper the strips may not match up!}
 
{pictured above is a "welcome" sign I did exactly like the "Love is Sweet"}
Let dry for 15-20 minutes or so.

Then apply another coat of mod podge on top of the scrapbook paper.


Let this dry for 30 minutes.
{I left it overnight to be certain}

In the meantime, you can cut out your vinyl letters! After you cut your saying with your machine, peel back the vinyl leaving only the words on the original backing. Then take your clear transfer tape and place over top of your phrase and rub smoothly. Peel the transfer tape from the original vinyl backing. Then place over top your board and smooth out all air bubbles.


Peel back the clear transfer tape slowly, making sure the vinyl letters adhere to the scrapbook board.


Apply another layer of mod podge over top of the vinyl lettering & allow to dry.


Here are the final products:

{this will go on our candy buffet table for the wedding}

This project is linked up with Craft-O-Maniac!

Happy Birthday Mom!

Today is my Mom's 42nd Birthday!


Happy Birthday to the best Mom in the world ♥

Saturday, January 29, 2011

wooden wedding sign tutorial

Our wedding theme is rustic elegance and I think these are going to be perfect signs for guests out of town trying to locate our venue. Plus, the remainder will be for ceremony/reception decor.

I practiced on a sample piece of wood today to see how hard/simple this project would be.
I plan on finishing up the remainder of signs within the next two weeks.


Here's what you do:

First, measure the wooden board you are going to use. Adjust the letters to fit and cut them out with your vinyl cutting machine (i.e. Cricut). 

Next, peel out the letters the machine cut & keep the stencil portion on the original backing.
Apply clear transfer tape over top of your stencil and rub. Peel the vinyl backing off by pulling back the transfer tape gently.

Next, apply the stencil to your wooden board. Smooth out the air bubbles with your hand.
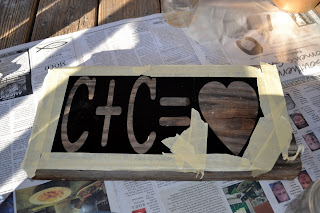
It'll look like this:


Pull back the transfer tape, leaving only the stencil behind.


Apply tape around the edges of the stencil to secure the lining & keep the spray paint from getting on the extra wood.


Because of the type of wood I chose, white spray paint wouldn't adhere to the board. 
I recommend testing it out on the backside prior to in order to make sure it'll stick.
The only open can of white paint we had in the closet was ceiling paint, so that's what I used for the base layer.


After I painted on the base layer with this, I let it dry for about 10 minutes then applied indoor/outdoor white spray paint on top for a second coat (not pictured).

{1st coat}

This is the final product!


Here are a few I've gotten inspiration from..


This post is linked up with Craft-O-Maniac!

Friday, January 28, 2011

fill in the blanks ♥

 
1. If my house was on fire & I could only grab 3 things, I would grab my new high-tech camera that the beau bought me for Christmas, my laptop & hardrive, and a box full of old photo albums. Pictures are truly the memories that are solely irreplaceable.
 

2. A smell I really like is fresh linen. I have a new Airwick dispenser that sprays every thirty minutes in our bedroom. L♥ve.
 

3. Something you might not know about me is I'm in nursing school, yet scared to death to donate blood. Bahaha ;) It's on my to-do list. And actually, this semester I get to skip out on a weekends worth of clinical paperwork {30+ pages so I've heard} if I donate! I'm definitely going for it!


4. Some of my favorite websites to putter around on are
blogger, Facebook, etsy, and theknot.com.

5. This weekend  I will buy postage and send out our STD's {hahahaa, save-the-dates, that is!}, finish up working on wedding guest favors, study for my first advanced care nursing exam, root on my brother's college baseball team that'll be playing in Alabama tomorrow {via cellular device unfortunately}, attend church, and wish my Mama a Happy Birthday on Sunday!

6. Nothing makes me happier than spending time with family! Coming home to a clean house after a long day is nice too :)
 

7. A bad habit I have is brushing my teeth too hard. It's actually so bad my gum line has began to recede and it's causing the nerves to become sensitive to touch on a few teeth. I was told to "brush softer". I didn't know brushing hard was a big deal! Thought I was getting them bad boys clean.
 

Click here to link up!

Wednesday, January 26, 2011

Wedding Wednesday's: a closer look at our venue.


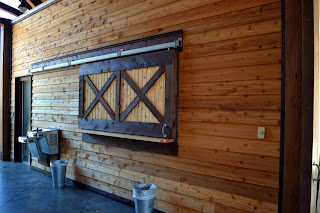
Sunday we took a trip over to our venue with our wedding coordinator in order to give her the FULL details on how we are envisioning our wedding. While we were walking around, I snapped a few pictures!
Take a look...


Saturday, I went and picked out groomsmen tuxes!
This is the exact one we choose.


The white shirt underneath is going to be microfiber fabric {which is lighter & cooler} rather than the normal pleated shirt.
Like this..

Paisley Ties:
Cliff: Ivory {matches my dress}
Groomsmen/Ringbearer: Chocolate {matches bridesmaid dresses}
Ushers: Tan

♥ Flower girl dress: I'm really liking this one from David's Bridal


♥ Update on save-the-dates: they came in yesterday! I will address them this weekend and be sending them out ASAP :)

Here's a sneak peak!

Hope everyone is having a wonderful week!