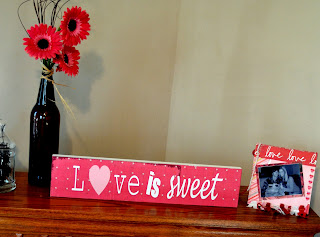
As I was working on this project over the weekend, I ran across these old wooden boards I had bought months ago from Hobby Lobby. I have been patiently awaiting the perfect project to come about, so while I had all of my supplies already scattered about I decided to give it a go.
Supplies:
- paint brush {$1}
- patterned scrapbook paper {$0.64- Michael's}
- matte mod podge {$4- Hobby Lobby}
- wooden sign {$5.99- 50% off= $3}
- vinyl {glossy white}
- vinyl cutting machine
Here's what you do:
First off, choose one sheet of 12x12 scrapbook paper of choice.
Then flip over the paper and place the wooden board in the corner of your paper and trace the outline. Because the board is longer than 12 inches in width, you will have to trace it multiple times. So, move the top of the board down to the line you just traced and trace another line underneath the bottom. Your paper should be divided into three segments.
{Sorry I don't have a picture}
Cut along the two lines you traced. You will end up with three pieces of paper. Only use the top two pieces. The third {bottom piece} will be slightly shorter than needed.
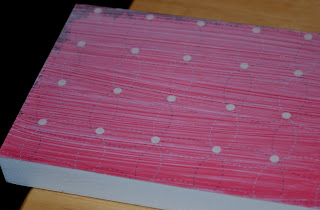
Next, mod podge the base board like so.
Then apply your scrapbook sheets over top of the board and adjust to fit accordingly.
{FYI- if using patterned paper the strips may not match up!}
{pictured above is a "welcome" sign I did exactly like the "Love is Sweet"}
Let dry for 15-20 minutes or so.
Then apply another coat of mod podge on top of the scrapbook paper.
Let this dry for 30 minutes.
{I left it overnight to be certain}
In the meantime, you can cut out your vinyl letters! After you cut your saying with your machine, peel back the vinyl leaving only the words on the original backing. Then take your clear transfer tape and place over top of your phrase and rub smoothly. Peel the transfer tape from the original vinyl backing. Then place over top your board and smooth out all air bubbles.
Peel back the clear transfer tape slowly, making sure the vinyl letters adhere to the scrapbook board.
Apply another layer of mod podge over top of the vinyl lettering & allow to dry.
Here are the final products:
{this will go on our candy buffet table for the wedding}
This project is linked up with Craft-O-Maniac!


Very Cute!! Wish I had a vinyl lettering machine.
ReplyDeleteCute Caitlin! Love it!
ReplyDeleteI'm still deciding if I wanna do a Candy Buffet! I have all my candy picked our and ready to order, but something is holding me back. I think they are a wonderful idea! :)
Oh this is just TOO cute! I wish I had the patience to be crafty :)
ReplyDelete